
Call Signatures
함수 위에 마우스를 올렸을 때보여지는 내용이 함수의 콜 시그니쳐
function add(a: any, b: any):any
와 같은 부분을 말한다.
Call Signatures는 함수의 매개 변수(인자)의 타입과 return 되는 반환값의 타입을 지정한다.
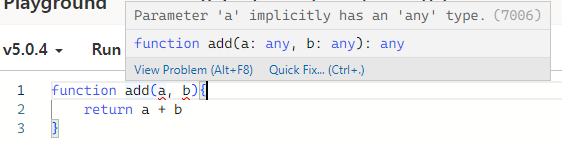
function add(a, b){ // Parameter 'a'/'b' implicitly has an 'any' type
  return a + b
}위의 경우 인자인 a와 b에 별도의 타입 지정을 해주지 않아 any임을 경고한다.
이는 각 인자에 타입을 지정해줌으로써 해결 가능하다.
// argument에 number 타입 지정해줌
function add(a: number, b:number) { // function add(a: number, b: number):number
  return a + b
}
// 함수가 number 타입을 반환한다는 것을 확인할 수 있음 (return 값에 :number 해주지 않아도 됨)이를 화살표 함수로 표현한다면 다음과 같다.
// 화살표 함수
const add = (a: number, b: number) => a + b; // const addL (a: number, b: number) => number
앞서 type alias를 이용했던 것과 같이
인자에 대한 타입도 미리 지정해서 전달해줄 수 있다.
type Add = (a: number, b: number) => number;

const add:Add = (a, b) => a + b;정리하자면, 내가 함수를 구현하기 이전에
내가 타입을 만들고, 함수가 어떻게 작동하는 지 서술할 수 있다.
만일 React.js 환경이라면,
props로 함수를 보내게 될 때, 타입스크립트에게 어떻게 함수가 작동하는지를 설명해주어야 하는데 위 방법으로 해결할 수 있는 것이다.
Overloading
오버로딩. function overloading, method overloading 이라고도 부른다.
직접 작성할 때 보다는, 외부 라이브러리 또는 패키지들에서 이 오버로딩을 엄청 많이 사용한다.
위에서 call signature를 작성하는 방법을 보여줬는데, 조금 더 길게 작성하는 방법이 있다.
이 방법이 존재하는 이유는 오버로딩 때문이다.
// call signature를 짧게 작성하는 방법
type Add = (a: number, b: number) => number

// call signature를 길게 작성하는 방법
type Add = {
  (a: number, b: number) => number
}
// 이 방법이 존재하는 이유는 오버로딩
오버로딩은 함수가 서로 다른 여러개의 call signatures를 가지고 있을 때 발생한다.
// 예시1) 복수의 call signatures + 다른 파라미터 타입
type Add = {
  (a: number, b: number) : number;
  (a: number, b: string) : number;
}

// const add: Add = (a, b) => a + b // Error
// Operator '+' cannnot be applied to types 'number' and 'string | number'.
// b가 string도 될 수 있고 number도 될 수 있기 때문에 더할 수 없다.

// 해결 방법
const add: Add = (a, b) => {
  if(typeof b === "string") // 매개변수 b의 타입이 다른 경우를 예외처리
    return a;
  return a + b;
}// 예시2) 복수의 call signatures + 다른 파라미터 개수
type Add = {
(a: number, b: number): number;
(a: number, b: number, c: number): number;
}
// const add: Add = (a, b, c) => a + b // Error
// Type '(a: number, b: number, c: number) => number' is not assignable to type 'Add'.
// 인자를 2개 받거나 3개 받거나 달라질 수 있기 때문에 더할 수 없다.
// 해결 방법
const add: Add = (a, b, c?: number) => { // 옵션같은 존재인 c가 아마도 number일 것 같다 알려줌
return a + b;
}
외부 라이브러리에서 오버로딩이 주로 사용된다고 했는데
React.js 프레임워크인 NextJS에서의 오버로딩 사용 예시를 가볍게 보여준다면 아래와 같다.
// string으로 보내기
Router.push("/home");
// object로 보내기
Router.push({
  path: "/home",
  state: 1
});

// --------------------

type Config = {
  path: string,
  state: object
}
type Push = {
  (path:string): void
  (config: Config): void
}

const push:Push = (config) => {     // config가 string이나 Config 타입을 가짐
  if(typeof config === "string") {  // 타입스크립트가 내부에서 타입을 체크
    console.log(config);
  } else {
    console.log(config.path)
  }
}
Polymorphism
다형성. poly(many) - morphos(structure). 여러가지 다른 구조들(형태들).
여러 타입을 받아들임으로써 여러 형태를 가지는 것을 의미한다.
다형성을 확인 할 예제를 보자.
함수 superPrint는 배열을 받고, 배열의 요소를 하나씩 출력해줄 것이다.
// 숫자, 불리언, 문자열 타입의 arr를 받는 함수의 call Signatures
type SuperPrint = {
  (arr: number[]):void
  (arr: boolean[]):void
  (arr: string[]):void
}

// 배열을 받아, 요소들을 하나씩 console.log하는 함수 superPrint
const superPrint: SuperPrint = (arr) => {
  arr.forEach(i => console.log(i));
}

superPrint([1, 2, 3, 4]);
superPrint([true, false, true]);
superPrint(["a", "b"]);위 코드에서, superPrint는 인자가 되는 배열이 다양한 타입을 받을 수 있도록 하기 위해서
type SuperPrint 내에서 각 타입 별로 call signature를 3개 작성해주었다.
여기에서 다형성을 활용하는 더 좋은 방법이 있다. 제네릭이다.
Generic
number, boolean, void, unknown 등 지금까지 배운 타입을 concrete type이라고 하는데
concrete type을 사용하는 것 대신에 generic type을 받을 것이다.
generic type은 타입의 placeholder 같은 것으로
내가 요구하는 대로 추론해서 함수를 사용하는, call signature를 생성해주는 것이다.
위 예제에서 generic을 사용하기 위해서 type SuperPrint 내에서 제네릭의 이름을 넣어줄 수 있다.
이는 타입스크립트에게 '이 call signature가 제네릭을 받는다' 는 것을 알려주는 방법이다.
제네릭의 이름은 <T>, <V>, <Potato>, <TypePlaceholder> 등 원하는 대로 지정이 가능하다.
// 어떤 타입의 arr도 받을 수 있도록 generic 지정
type SuperPrint = {
  <TypePlaceholder>(arr: TypePlaceholder[]):void
}

const superPrint: SuperPrint = (arr) => {
  arr.forEach(i => console.log(i));
}

superPrint([1, 2, true, false, "hello"]); // 모든 타입 이용 가능
// const superPrint: <string | number | boolean>(arr: (string | number | boolean)[]) => void타입스크립트는 superPrint([...]) 내에서 작성된 ... 를 보며 타입을 유추해 call signature를 보여준다.
우리는 superPrint([1, 2, true, false, "hello"]) 에 마우스를 올려 call signature를 확인할 수 있고

그 내용을 통해
'[1, 2, true, false, "hello"] 를 확인한 뒤 number, boolean, string이 arr에 들어갔겠구나'를 유추했음을 알 수 있다.
함수 superPrint를 console.log 하는데에 그치지 않고, 배열의 첫번째 요소를 return 하도록 수정해보자.
type SuperPrint = {
  <T>(arr: T[]): T // (type parameter) T in <T>(arr: T[]): T
}

const superPrint: SuperPrint = (arr) => arr[0];

const a = superPrint([1, 2, 3, 4]);        // const a: number
const b = superPrint([true, false]);       // const b: boolean
const c = superPrint(["a", "b", "c"]);     // const c: string
const d = superPrint([1, false, "hello"]); // const d: string | number | booleanreturn할 값이 있으므로 void 대신에 generic을 입력해주면 된다.
type SuperPrint는 화살표 함수를 이용해서 아래와 같이 작성도 가능하다.
type SuperPrint = <T>(arr: T[]) => T
정리하자면
generic을 사용하면 call signature를 우리가 직접 작성해줄 필요 없이
요청만 함으로써 call signature를 자동 생성시킬 수 있다.
만일, 제네릭을 하나 더 추가하고 싶은 경우는 다음과 같이 작성 가능하다.
type SuperPrint = <T, M>(a: T[], b: M) => T

const superPrint: SuperPrint = (a) => a[0];

const aa = superPrint([1, 2, 3, 4], "hello");
// const superPrint: <number, string>(a: number[], b: string) => number

const bb = superPrint([true, "hello"], []);
// const superPrint: <string | boolean, never[]>(a: (string | boolean)[], b: never[]) => string | boolean
Generic 사용 예시
실제로는 위와 같이 generic을 사용해 직접 call signature를 만드는 일은 거의 없을 것이다.
주로 외부 라이브러리, 패키지를 사용할텐데, 그 라이브러리들이 제네릭을 통해 생성되기 때문이다.
다시 말하자면, 라이브러리를 만들거나 다른 개발자가 사용할 기능을 개발하는 경우에는 제네릭이 유용할테지만
그 외 대부분의 경우에서는 제네릭을 직접 작성하는 일 없이 사용만 할 것이다.
위에서 진행한 예시를 function superPrint로 한 번에 녹여내면 아래와 같다.
function superPrint<V>(a: V[]){
  return a[0];
}

const a = superPrint([1, true]);제네릭은 커스텀 및 재사용이 가능하며, 아래와 같이 타입을 확장해나가며 사용할 수도 있다.
// type Player = {
//   name: string
//   extraInfo: any
// }
// any를 이용하면 보호받지 못하기 때문에 대신에 generic 사용

type Player<E> = {
  name: string
  extraInfo: E
}

const sryung: Player<{favFood: string}> = {
  name: "ryung",
  extraInfo: {
  	favFood: "hamburger"
  }
}
// -------------- 아래와 같이 확장 가능
// type RyungExtra = {
//   favFood: string
// }
// type RyungPlayer = Player<RyungExtra>
// const sryung: RyungPlayer = {
//   name: "ryung",
//   extraInfo: {
//     favFood: "hamburger"
//   }
// }

const eve: Player<null> = {
  name: "eve",
  extraInfo: null
}
함수 뿐만 아니라 다양한 경우에서도 generic을 활용할 수 있다.
Array 기본 형태도 generic으로 디자인되어 있고,
const numArr: Array = [1, 2, 3, 4];
React의 useState도 generic으로 디자인되어 있다.
const [state, setState] = useState();
참고
TypeScirpt Document - Call Signature
'TYPESCRIPT' 카테고리의 다른 글
| [TYPESCRIPT] Type과 Interface의 차이점. 그리고 추상클래스 (0) | 2023.05.10 |
|---|---|
| [TYPESCRIPT] Class를 이용해서 객체지향 프로그래밍 해보기 (1) | 2023.05.07 |
| [TYPESCRIPT] 타입스크립트 큰 맥락 파악하기 : 타입들 총 정리 (0) | 2023.05.03 |
| [TYPESCRIPT] 추론적 타입과 명시적 타입 (0) | 2023.04.26 |
| [TYPESCRIPT] 타입스크립트란? 자바스크립트와의 차이점 (0) | 2023.04.25 |